UG:Trendset USER GUIDE
From UG
History
See Also
- Link to dev spec: EDI with Trendset
Intro
Trendset is a third party freight audit and bill payment company currently being utilized by Elizabeth Arden.
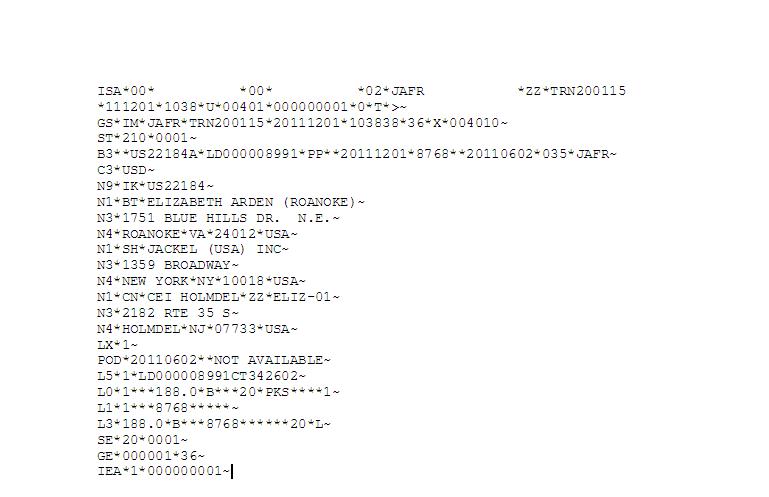
CT2 now has new functionality that provides the ability for us to electronically transmit our invoices to trendset via EDI.
At this time, Trendset is set up only for EA trucking domestic shipments that are routed through the TMS and handled by Jewels Transport.
Admin Section
Admin Location
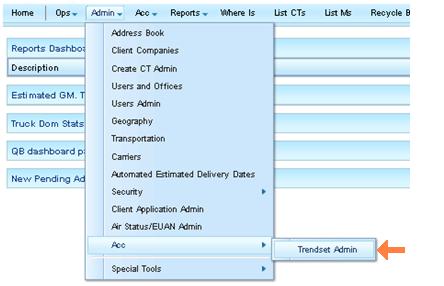
Trendset is controlled in the admin section of CT.
Admin -> Acc -> Trendset
Setting Admin Conditions
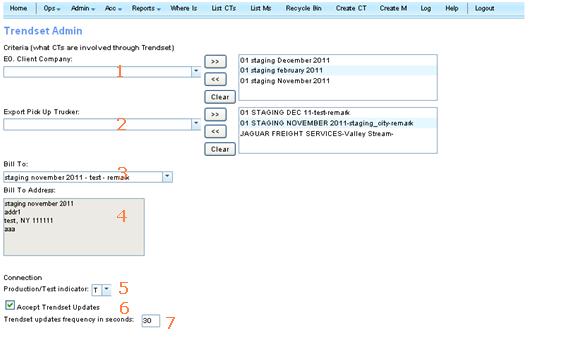
Filters that can be set in the admin section:
1. E0. Client Company: This is a multi-select option to filter records with specific client companies. Right now this should be set to EA Dom Portal only.
2. Export Pickup Trucker: This is also a multi-select option to filter records by specific truckers. Right now this should only be set to Jewels transportation.
3. Bill to: Drop down to select the invoice bill to party. Right now this should be set to Elizabeth Arden (Roanoke) – Roanoke.
4. Bill to Address: This is read only and should reflect the address of the selected bill to party.
5. Connection: This is drop down option indicates to Trendset if the information being transmitted is test information or real (production) information. This was set up because Trendset does not have a test environment.
6. Accept Trendset Updates: When checked it enables the system to accept updates from Trendset.
7. Trendset updates frequency in seconds: This tells the system how often to check for the updates from Trendset.
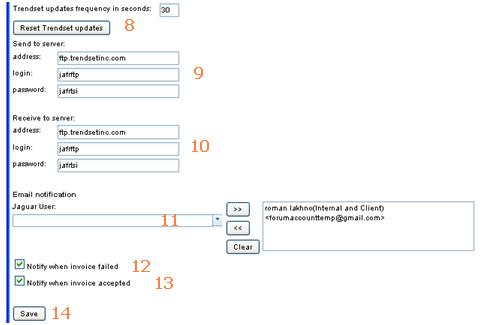
8. Reset Trendset updates: This is an emergency button that will recheck the server for incoming messages. This button should only be used if our system stops processing incoming messages, this does not apply to outgoing messages.
9. Send to server: This is the address where our system should transmit the information to.
10. Receive to server: This is the address where our system should get to retrieve updates from.
11. Email Notification: This is a multi-select option that indicates which operators should receive notifications from Trendset.
12. Notify when invoice failed: When this check box is checked the operators selected to receive updates will receive an email that the transmission has failed.
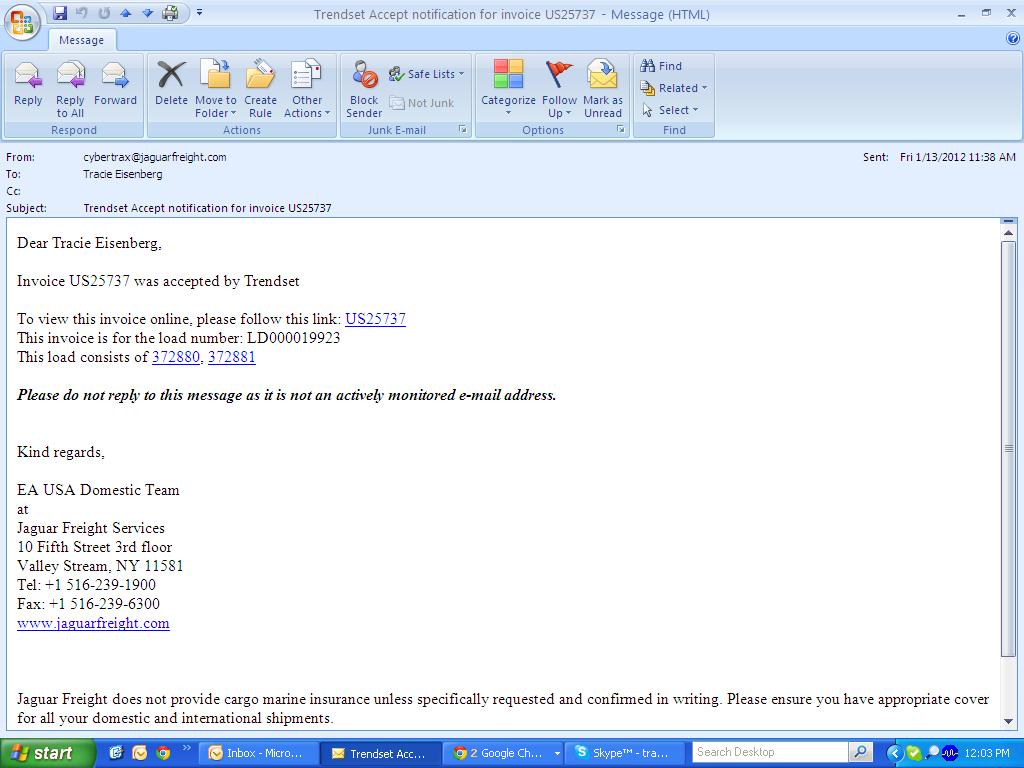
13. Notify when invoice accepted: When this check box is checked the operators selected to receive updates will receive an email that the transmission has been accepted.
14. Save button to save the information entered.
Business Process Section
EOD and Email Correspondence
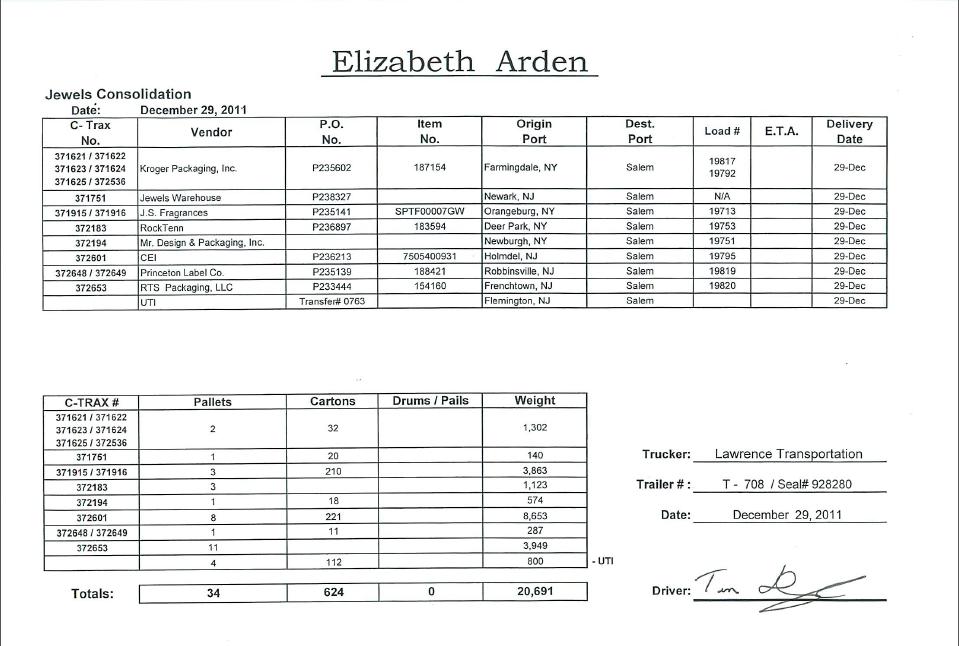
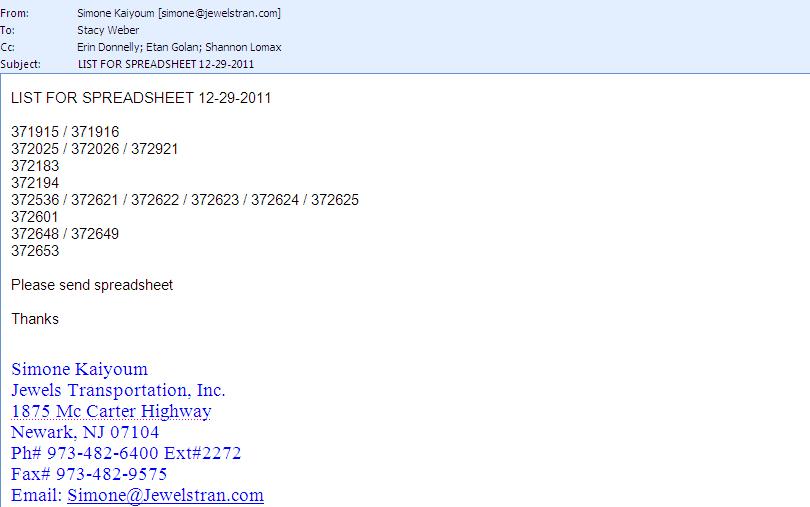
Operator begins when they receive an EOD (End of day) or POD (Proof of delivery) manifest from the trucker - Jewels for the previous days deliveries.
The operator will double check the manifest against TMS & make any corrections required to either one (the manifest or the TMS system). Then the operator will update the CT records to reflect this information. Once all is updated and approved, they will send the approval back to Jewels and Jewels will send an email reply again listing all of the CT records that should be included on the Trendset spreadsheet.
Updating Cybertrax
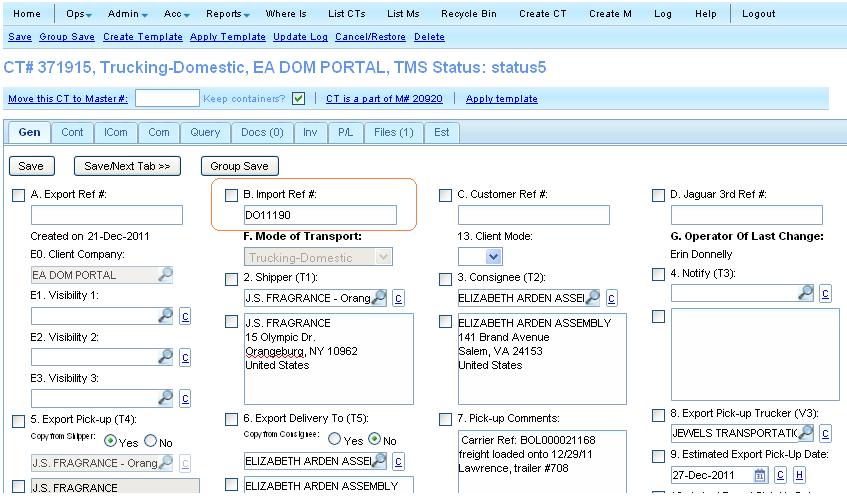
The operator groups all of the CT's listed on the email and updates all records in the group with the import ref #.
Since Trendset is currently only being used for EA Dom Portal trucking shipments,
this reference number will begin with DO (Domestic Order)
and is assigned according to a manual list that is kept sequential order
Currently grouping is being discussed among operations, BA and Dev.
Tira advised that they do not need to be grouping shipments anymore
Erin (operations) advised that they group all of the shipments
Tira advise she would discuss with Misha and Rob
The operator will then create a master based on the CT record they are currently in.
Truck Billing Manifest for Master
Truck Billing Manifest for Master Location
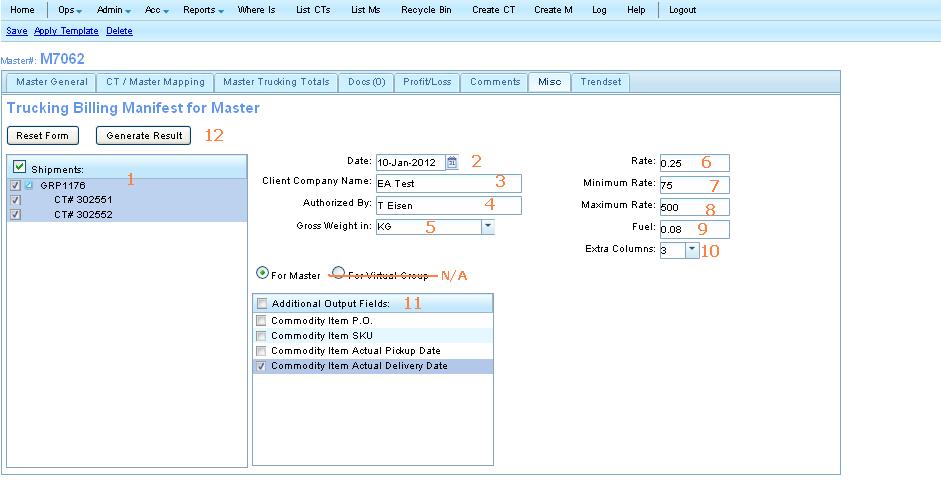
Master > Misc tab > Trucking Billing Manifest for Master
Generating Truck Billing Manifest for Master
The operator will now go into and create the Trucking Billing Manifest for Master spreadsheet. Once they enter all of the sell rates and tags the operator will generate the spreadsheet.
- Operator will double check to make sure all CTs in the master were delivered. Any records that were not delivered, must be removed from the master.
Notes:
Multiple loads in one master is okay
Master can either be grouped together in one group or does not require a group at all.
The master cannot contain more then one group.
1. Check box with the option to select a single CT, multiple CT’s, or all CT’s
2. Date defaults to today’s date – If this date is changed it will only affect the tag on the spreadsheet.
3. Client Co. name - This is a tag only.
4. Authorized by – This is a tag only also.
5. drop down to select the unit of weight (LBS or Kg) for the spreadsheet
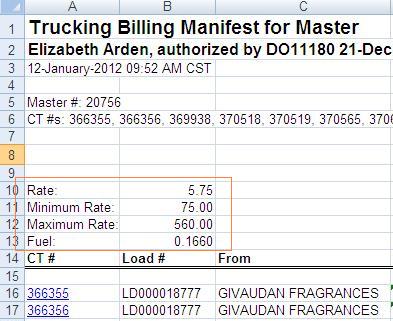
6. This is the rate per unit (based on the unit that is selected on the previous drop down). This will be used to calculate the sell rate on the spreadsheet.
7. This is the minimum charge for each load, to be used on the spreadsheet to calculate sell rate.
8. This is the maximum rate for each load, to be used on the spreadsheet to calculate sell rate.
9. This is the rate for fuel, also being used as sell rate calculation on the spreadsheet.
10. Dropdown option to allow operator to insert extra columns into the spreadsheet if required.
11. Check box option to allow the operator to include additional outputs on the spreadsheet. This check box allows the operator to select one option, multiple options or all options.
12. Click to generate results - which will generate the Trucking Billing Manifest spreadsheet. Operator also has the option to click on Reset form for clear out all filters that were set.
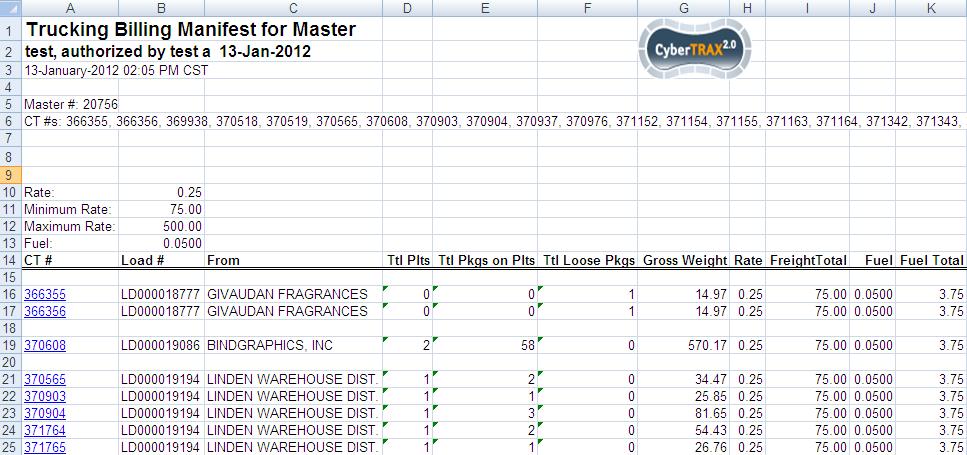
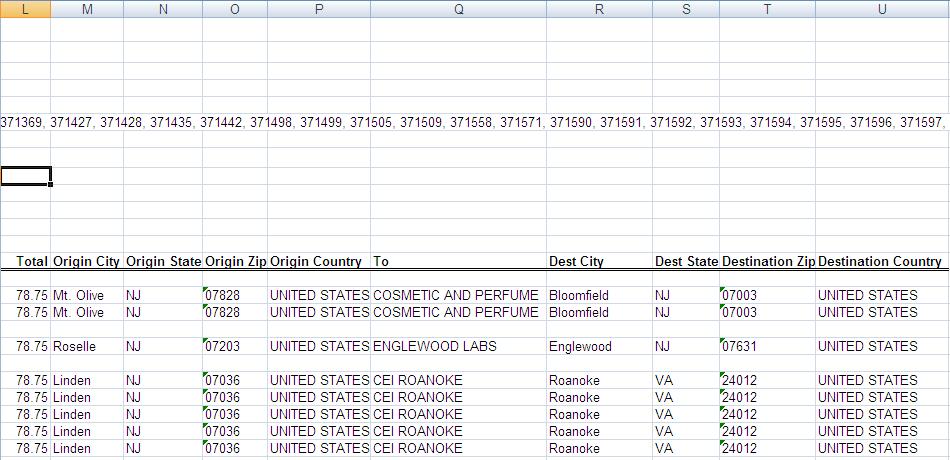
Example of Generated spreadsheet
Note: At this point the spreadsheet should only reflect our cost or purchase rates.
Manual corrections to the spreadsheet
Once the spreadsheet is generated the operator will make the following manual corrections to the spreadsheet.
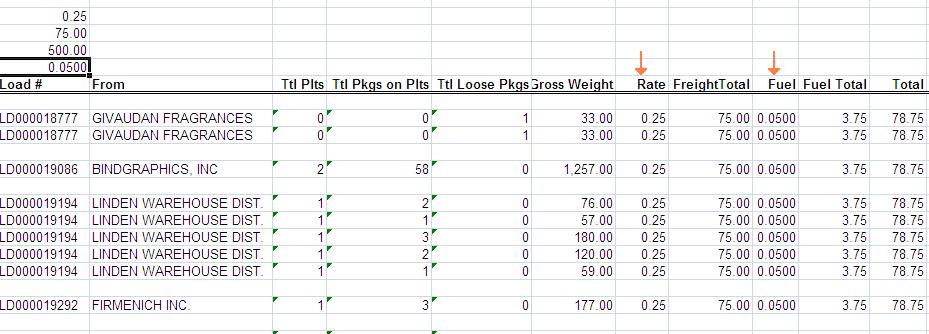
- Since billing is done according to each load, the operators will recalculate the correct totals for the whole load and enter the total on the 1st line for each load. This is because the system will calculate the totals per line on the spreadsheet instead of per load.
- Once they have recalculated these charges and added it to the first line, the operator will need to 0.00 the rates on the remaining lines.
Once all corrections have been made the operator will then send this spreadsheet to the trucking company (Jewels) for approval. The trucking company will make any necessary changes and send back to operator.
Before uploading the operator will now change the rate section of the spreadsheet to show the Sell rate instead of the cost rate. Once it is changed in this section spreadsheet will calculate the charges in each load.
Before uploading the operator needs check the following:
- The first line of each load contains a cost - it cannot show a zero.
- Make sure that the load numbers have not changed during the time the spreadsheet was pending approval
- Remove the rate and fuel columns from the spreadsheet.
Now the operator is able to upload the spreadsheet. They save the spreadsheet and go into the Trendset tab
Notes:
 The Trendset tab will only be visible in masters that match the trendset criteria set in admin.
Currently the operators are forwarding the spreadsheet to Ihelp so Ihelp can double check it before upload is done.
This is because there have been several times spreadsheets were uploaded that were incorrect.
At this time, credit notes cannot be done for these shipments.
Uploading the manifest
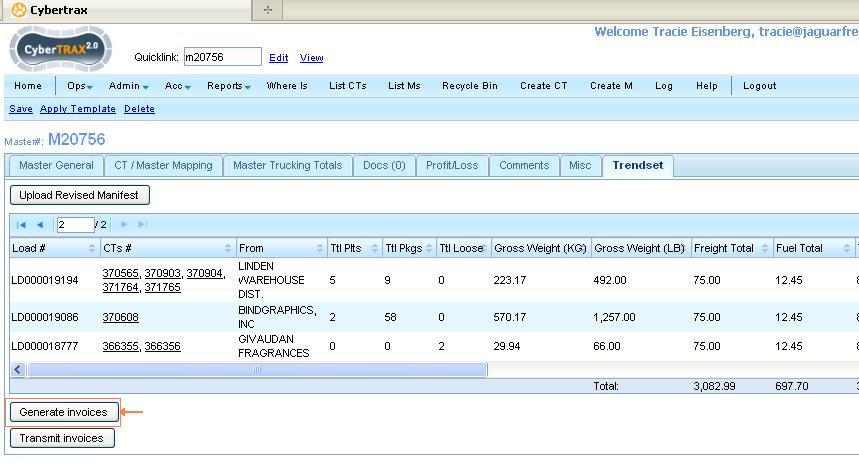
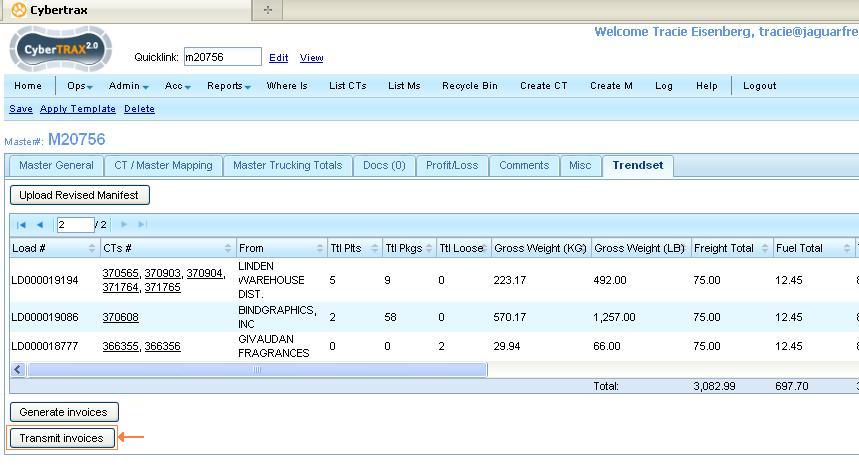
Operator will then go to the Master > Trendset Tab and click on Upload Revised Manifest


Once operator has uploaded the spreadsheet, the details will show on the trendset tab.
The operator should now double check all of the details to confirm the files was uploaded correctly.
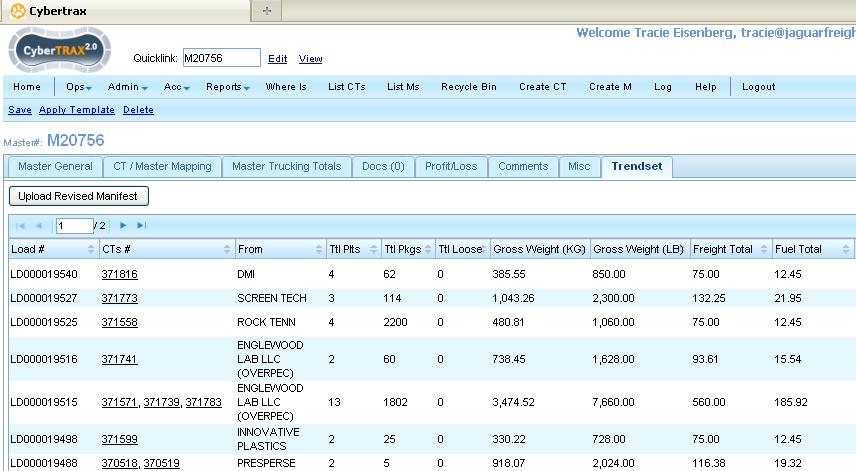
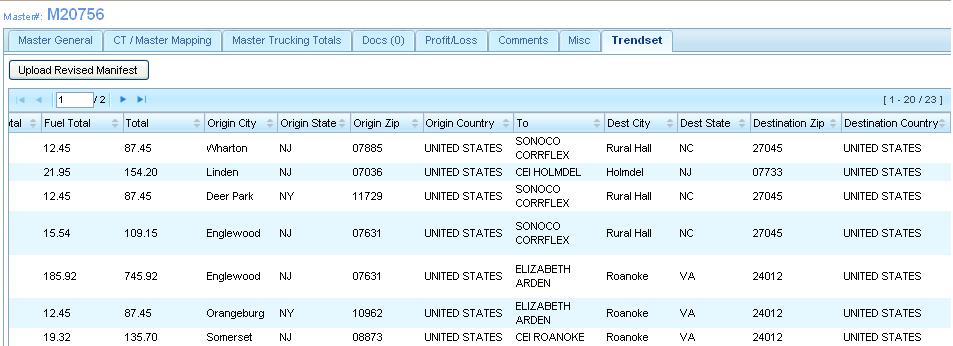
Once the operator has confirmed the details are correct, they can now generate the invoices.
Generating the invoices
They will do this by clicking on the generate invoices box on the trendset tab.
- Once this is clicked the invoices will be generated.
- Right now only two charge codes are being handled this way 1505 Domestic Trucking and 1506 Trucking Fuel Surcharge. Any other charges that need to be invoiced is done using paper invoices not through EDI.
Transmitting to Trendset
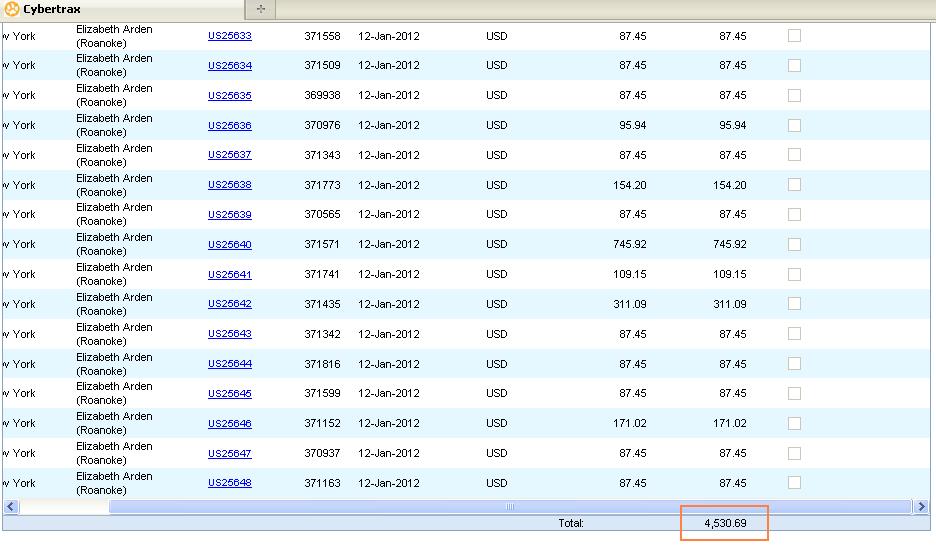
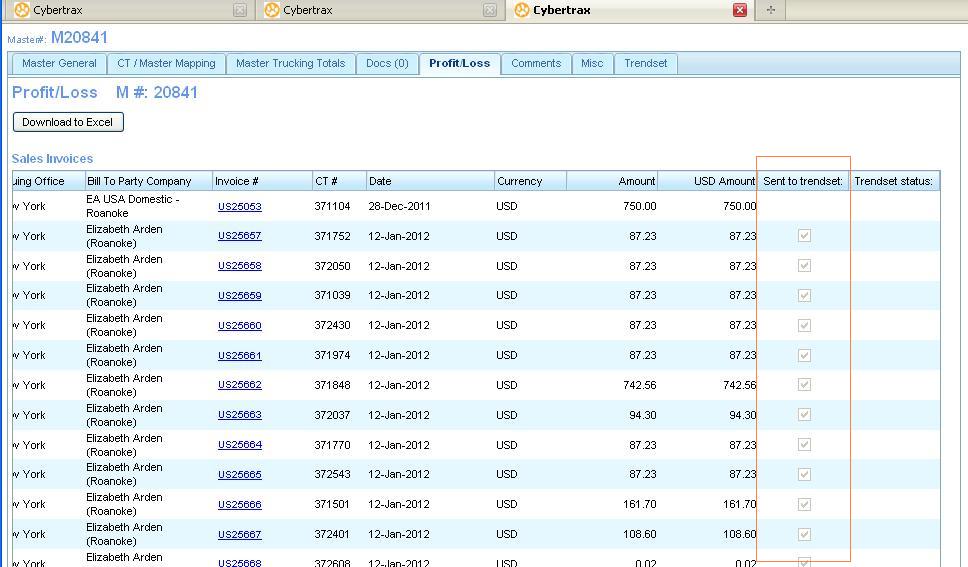
The operator should now go to the P/L tab to confirm the total generated is correct.
- If any manual invoices were generated, that amount would need to be deducted from the total before confirming a match.
- This server holds both the outgoing and incoming (997) messages
- Mapping can be found under Mantis: 2996
Trendset Status
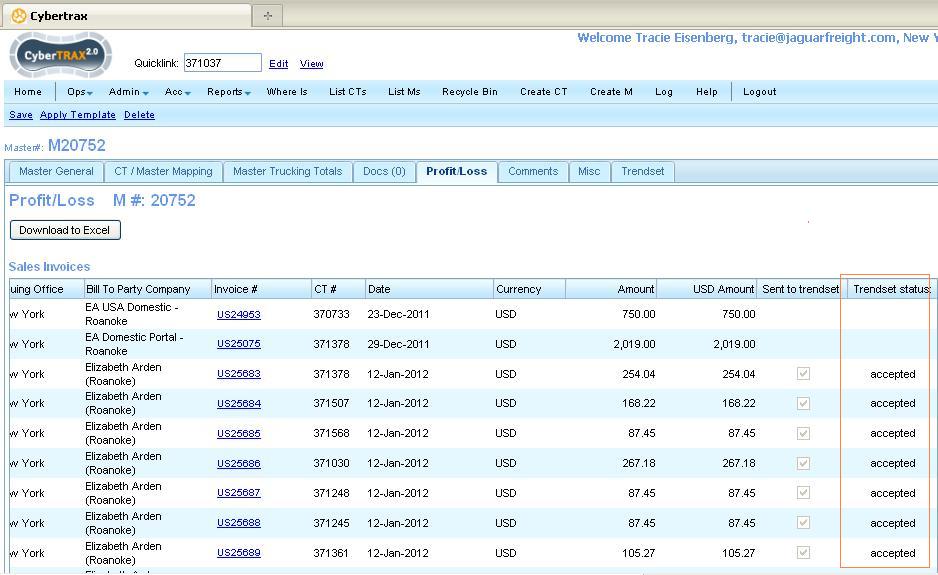
The Trendset status will remain blank until the transmission has been accepted by Trendset.
- An accepted status only indicates that Trendset has received the transmission, it does not mean that they are accepting the charges.
Once Trendset has accepted the transmission the status will show accepted.
- If there is a problem with the transmission the status should show as rejected instead of accepted.
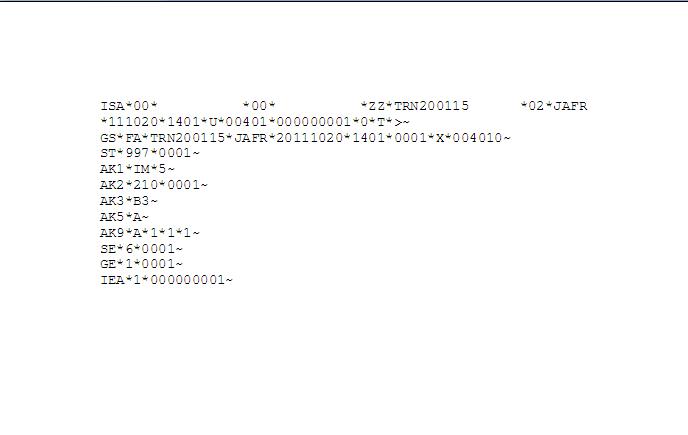
- Mapping can be found under Mantis: 2996
- Once the outgoing message has been retrieved by Trendset or the incoming message has been retrieved by our system, the folder will be blank. Any messages in the folder indicate the transmission has not yet been retrieved.
Additional Status Indicators
An email can also be sent.
- This will only be done if it is set up like this in the admin section
The email will indicate if the transmission has been accepted or rejected by Trendset
- Once again this is strictly the transmission only - not an acceptance of the invoice or charges.
Log
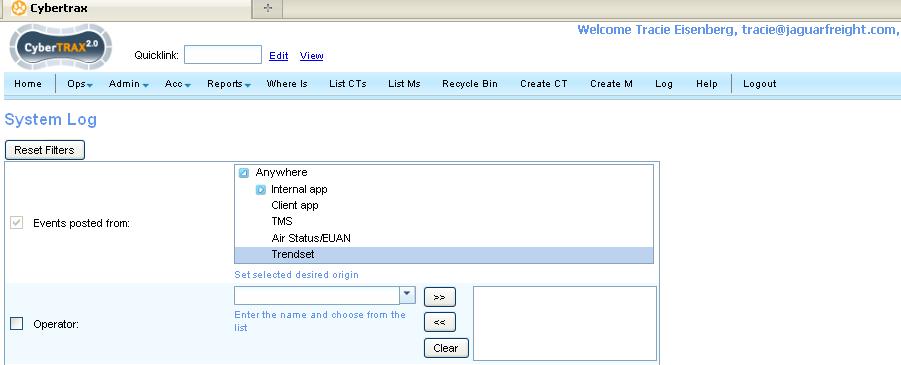
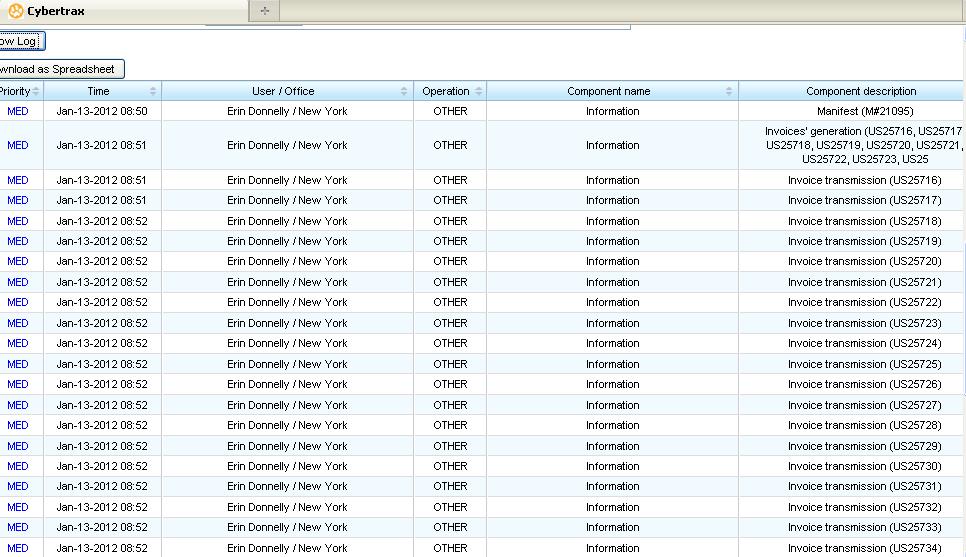
The Trendset events will be logged.
Location: Log > Events posted from = Trendset
Notes
- Accounting's business process has not changed due to Trendset.
