EDI to QB for Sales Invoices USE CASES
From UG
Contents
|
Business Story
Accounting operator Clark Kent in NY Jaguar Office responsible for daily upload of Sales Invoice (and Credit Notes) into QuickBooks.
Manager Lex Luthor in NY Jaguar Office has access to Admin part of CyberTrax 2 and can control the settings of NY Jaguar office and Jaguar users.
Use Cases
UC1: Set daily time of creating of bunch IIF-file
Where: Admin - Users and Offices - Offices. Edit Office window.
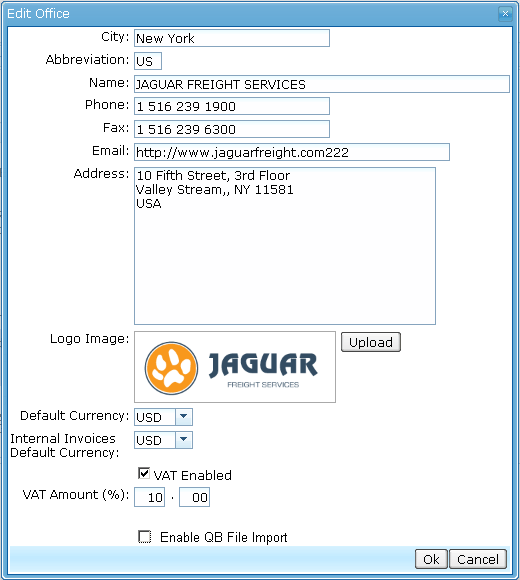
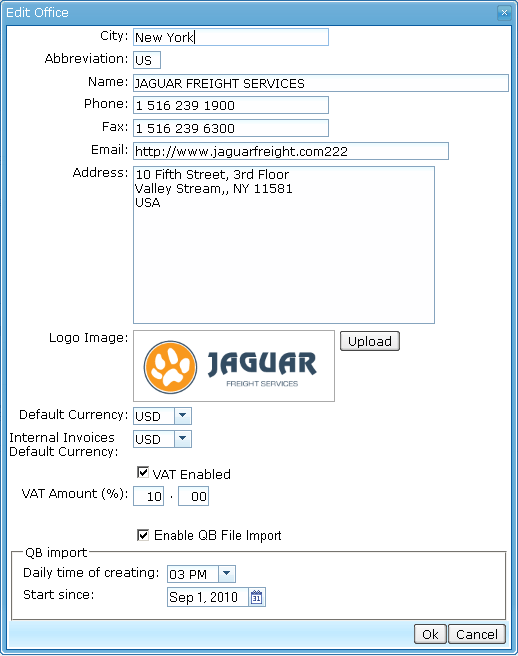
What: Lex Luthor checks the "Enable IIF-file creation" checkbox for appearing of the group settings. Then set daily time of creating of bunch IIF-file to 03 PM (NY Time Zone) and also set first date of bunch creating to September, 01, 2010. This means that first bunch file will be able on 1st September at 03 PM by New York time.
Figure 1. Edit Office window
a. "Enable IIF-file creation" checkbox is not checked yet:
b. "Enable IIF-file creation" checkbox is checked:
UC2: Set visibility of QB dashboard panel
Where: Admin - Users and Offices - Jaguar Users. Edit Jaguar User window.
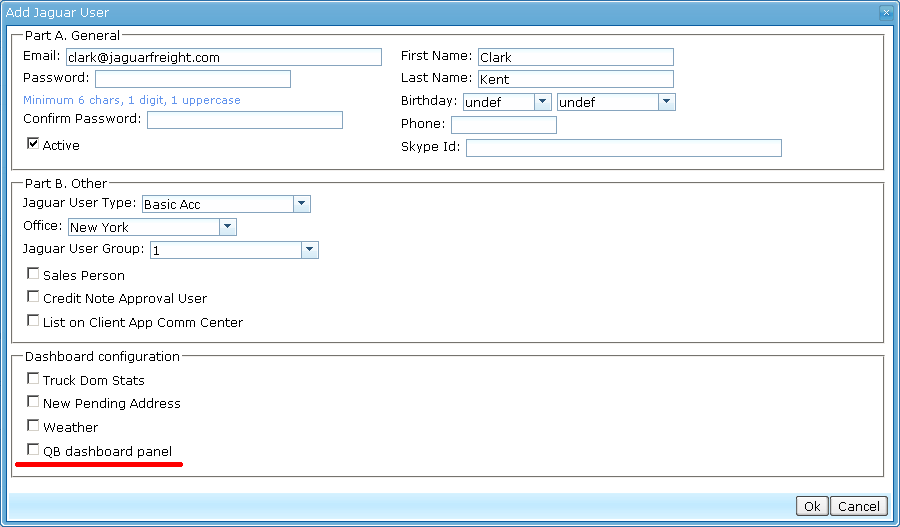
What: Lex Luthor sets the "QB dashboard panel" checkbox to "checked" state that Clark was able to see this panel on the homepage of CT2.
Figure 2. Dashboard configuration in user profile
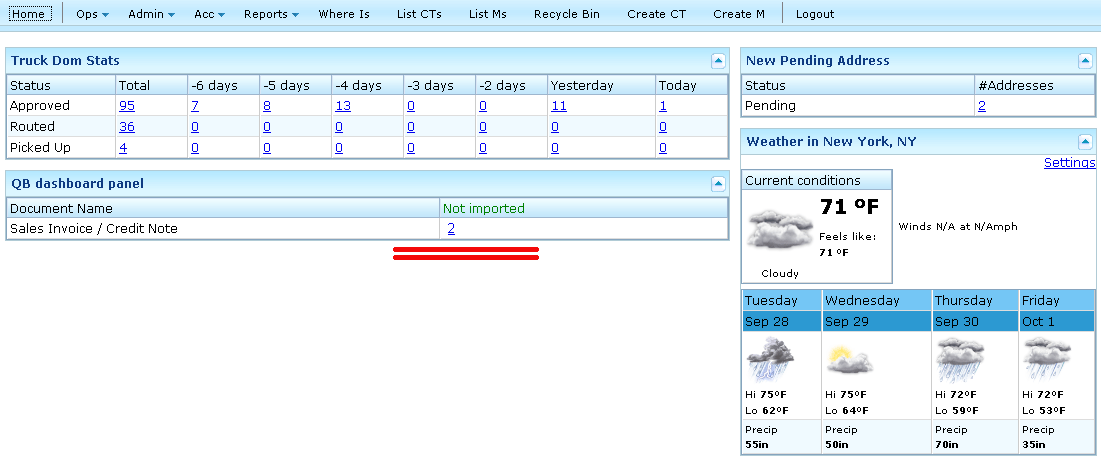
After turning on of visibility of QB panel it appears on the CT2 homepage with numbers of not imported documents (Main Menu - Home - QB Dashboard Panel).
- Example: 19 / 8 means that there are 19 Sales Invoices and 8 Credit Notes in the CT2 which still weren't imported into QB.
Figure 3. QB dashboard panel on CT2 homepage
UC3: View and download bunch file
Where: QB dashboard panel on CT2 homepage.
What: Clark Kent clicks on the numbers of non-imported docs in the QB dashboard panel. System opens a new window - "List Of Invoices".
Figure 4. List of Invoices window
Each row of the table corresponds to one date for which the documents were created and uploaded into IIF-File. In the one IIF-file is collected both of types of documents - Sales Invoices and Credit Notes. Each cell of "Filename" column shows the name of IIF-file and also is a link to downloading. Click on this link allows to user download IIF-file for preview and further importing into QA.
UC4: Initial steps
Where: Simultaneously in QB dashboard panel on CT2 homepage and QuickBooks.
What: Clark Kent compares the numbers of sales invoices / credit notes in the QB and specified range of documents on the QB panel.
These actions are performed once after first creating of the IIF-file. It is needed to determine the range of documents that didn't been entered manually in QB but didn't will imported into QB from CT2 through the bunch IIF-file.
- All these documents should be entered to QuickBooks manually. Their numbers should be defined as follows:
- Number of first document should be next after last manually entered for each type (Sales Invoice, Credit Note).
- NOTE: This should be the last document of a certain type in the Quickbooks at the current moment.
- Number of last of them should be preceded by the first document that was included in a first IIF-file. As well separately for each type (Sales Invoice, Credit Note).
- NOTE: This should be the first document of a certain type in the first IIF-file.
- Number of first document should be next after last manually entered for each type (Sales Invoice, Credit Note).
UC5: Review info from bunch file
Where: Computer of Accounting operator. MS Excel (or other spreadsheet application).
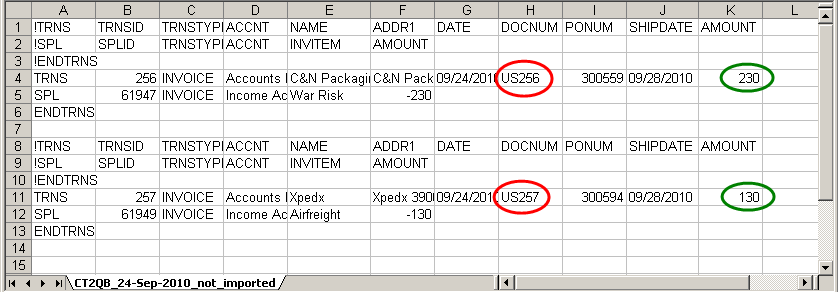
What: Clark simply opens IIF-File from Excel and reviews information inside. For example, checks the numbers of invoices (circled in red) or amounts (circled in green).
Figure 5. Preview IIF-file in Excel
As an alternative to the preview, we can consider the second duplicate base directly in the program. It can be used to test the import of invoices. So it is possible to test the response of the system on the import of this bunch, without prejudice to the actual data.
UC6: Upload info into QB
Where: Computer of Accounting operator. QuickBooks accounting system.
What: Clark uses standard QuickBooks procedure for import of IIF-file.
UC7: Confirm in CT2 the successfull import into QB
Where: QB dashboard panel on CT2 homepage.
What: Clark Kent immediately after successful import of bunch into QB marks it in "Imported" column on QB panel. To do this, he sets the checkbox to the state "checked". System shows actual state of bunch after confirm by user in the confirmation window. See List of Invoices.
Figure 6. Confirmation window
The inverse action of status change also requires a similar confirmation from the user.
