UG:Client Application USER GUIDE
From UG
(→Business Process for SKU to Planner Map) |
(→Business Process for SKU to Planner Map) |
||
| Line 73: | Line 73: | ||
This excel file contains a list of item codes and the planners that are responsible for those items. It also contains the item description and it's value according to the price of each piece. | This excel file contains a list of item codes and the planners that are responsible for those items. It also contains the item description and it's value according to the price of each piece. | ||
| - | The following spec [[#SKU_to_Planner_map]] contains the instructions on how to upload the file. | + | The following spec [[#SKU_to_Planner_map]] contains the instructions on how to upload the file. |
''Note:''' once the excel file, copy the data (to get rid of any macros inside of workbook) and then paste into a new excel worksheet. We also have to re-order/format the Header names when we are ready to paste into the new excel file. | ''Note:''' once the excel file, copy the data (to get rid of any macros inside of workbook) and then paste into a new excel worksheet. We also have to re-order/format the Header names when we are ready to paste into the new excel file. | ||
| Line 79: | Line 79: | ||
Paste onto Line # 5 the header names and then data begins on line # 6 and so on. | Paste onto Line # 5 the header names and then data begins on line # 6 and so on. | ||
| - | + | List the following header names & their values: | |
| - | + | ||
| + | *Item Code | Planner Name | Item Description | Value | ||
| + | |||
| + | ==== Excel File Ready to Upload ==== | ||
So your finished excel file should look like this and its now ready to upload into CT. | So your finished excel file should look like this and its now ready to upload into CT. | ||
Current revision as of 14:06, 10 April 2012
Contents |
[edit] Intro
This is an area where JFS admin users can manage the specific features that directly related to the client application. There are two parts to this menu as there's an Admin section and a document upload feature that is specific to the Elizabeth Arden Domestic Trucking business process.
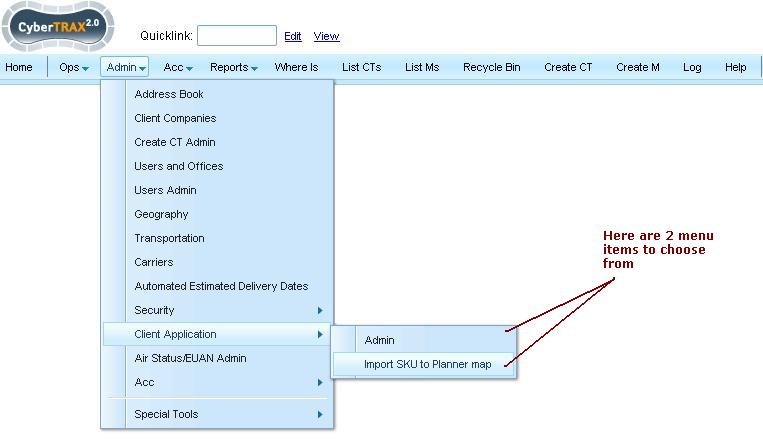
[edit] Select Admin Menu > Client Application
Once selected, a sub-menu will come up with 2 choices. Admin Or Import Sku to Planner Map
[edit] Select "Admin"
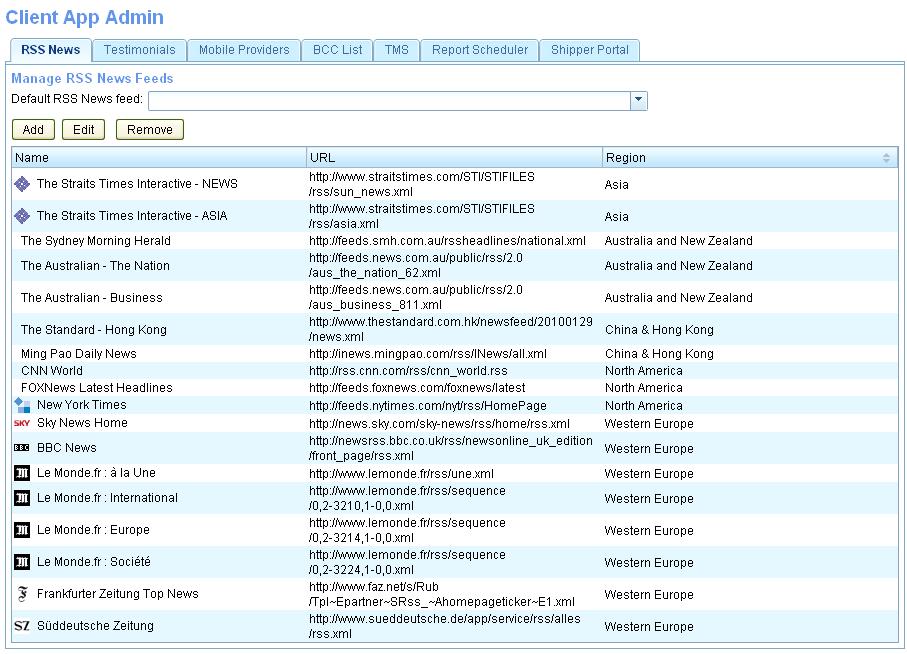
This here is a list of the current widget features available on the client applications Home Page (or the Clients main dashboard). They are broken down into 7 tabs and each of the tabs has an option to either Add, Edit or Remove.
[edit] RSS Feed
Here is where admin users can add, edit or remove the list of RSS New Feeds that are found on the client application. These RSS News feeds are managed by the client users from inside of the My Profile option found on the client's homepage. Its a list of sites and current news feeds they can select from and once saved, it will display a RSS News Feed widget on the clients homepage.
[edit] Testimonials Tab
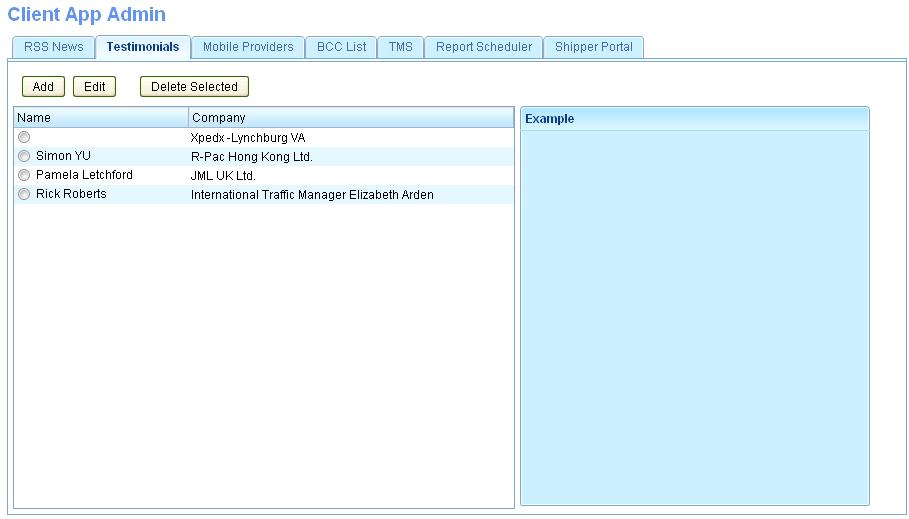
Here is where admin users can enter a new written client testimonial and once saved, it will display on the client apps home page, on the Testimonial widget.
[edit] Mobile Providers
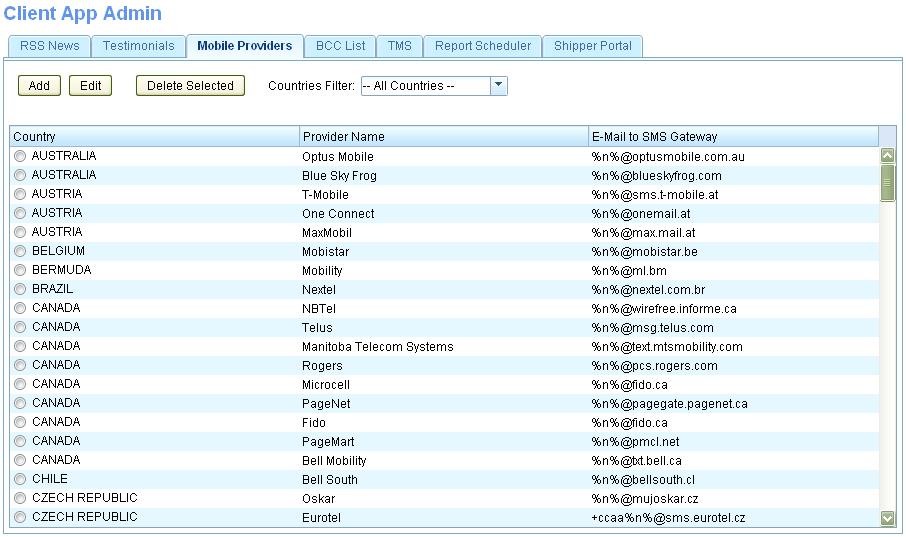
Here is where admin users can add, edit or remove mobile carriers, that can be used by client users. It can be turned on or off by the users inside of the My Profile option found on their footer. Its a list of mobile carriers that they can select from, to add in their mobile phone information to be able to receive Shipments Status Notifications via SMS text messaging.
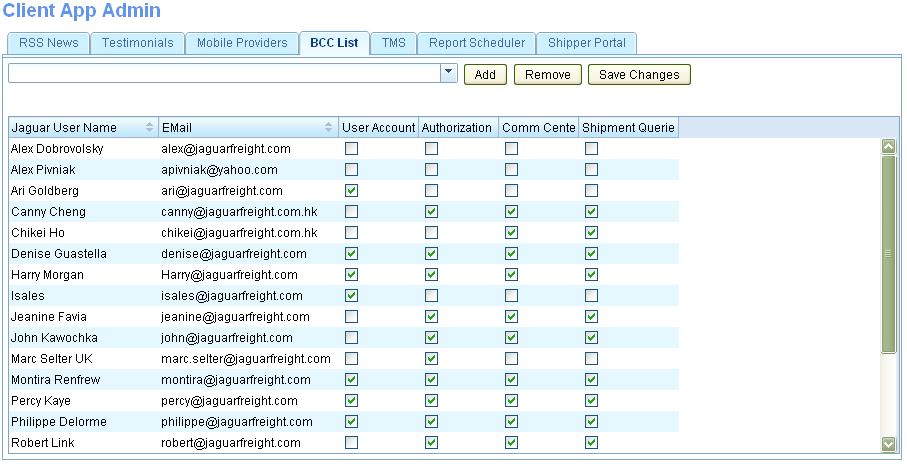
[edit] BCC
Here is where admin users can add their e-mail address to be in BCC for specific notifications that are sent from CyberTrax.
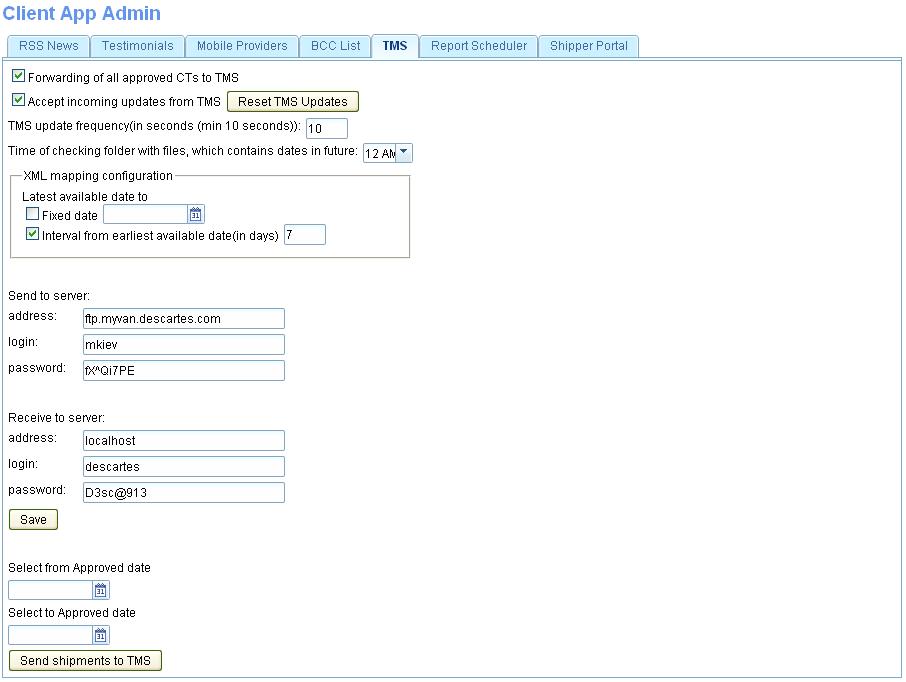
[edit] TMS
This is where we manage the messages that's being sent and received to the TMS. It includes the time parameters that we use, for how often the system is to send the messages into the TMS and how often the system is to check for new messages being received. As well it includes the server information that is used for passing these electronic messages.
[edit] Report Scheduler
This is an area for admin users to select which client app role can have access to the Report Scheduler feature. Currently there are only 3 client app roles available to chose from (Client, Shipper & Planner). Note: This feature is NOT currently being used as there are some tweaks needed before rolling out to our clients
For more information regarding this feature, see Client_Report_Scheduler
[edit] Shipper Portal
This is an area for admin users to select which planner role users (which is the ASN portal, JFS's TMS Solution) can have a download to excel feature available on their tabbed shipment pages. This currently is being used only by EA Planners who are subject to the Double Approval Process. For more information regarding this feature, see Cybertrax_2.1_Client_(requirements)#Double_Approval_Process_Feature
[edit] Client Application >> Import SKU to Planner Map
This feature is found under Admin > Client Application Admin and is the 2nd submenu item available. Once you click on the Import SKU to Planner Map a popup window displays for the user to upload the latest SKU to Planner mapping.
For more information regarding this feature, see Cybertrax_2.1_Client_(requirements)#SKU_to_Planner_Mapping_Feature
[edit] Business Process for SKU to Planner Map
Elizabeth Arden's Supply Chain Manager, Christine Carovillano, sends an e-mail to montira@jaguarfreight.com; marc@jaguarfreight.com & ihelp@jaguarfreight.com with an attached excel file.
This excel file contains a list of item codes and the planners that are responsible for those items. It also contains the item description and it's value according to the price of each piece.
The following spec #SKU_to_Planner_map contains the instructions on how to upload the file.
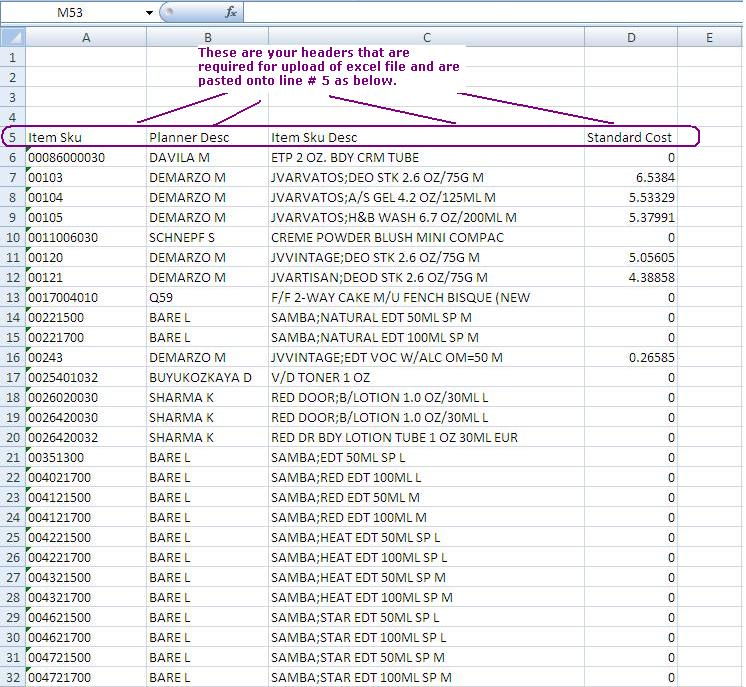
Note:' once the excel file, copy the data (to get rid of any macros inside of workbook) and then paste into a new excel worksheet. We also have to re-order/format the Header names when we are ready to paste into the new excel file.
Paste onto Line # 5 the header names and then data begins on line # 6 and so on.
List the following header names & their values:
- Item Code | Planner Name | Item Description | Value
[edit] Excel File Ready to Upload
So your finished excel file should look like this and its now ready to upload into CT.
[edit] History
[edit] Ver 1
- Originally Implemented in the beginning of CT2
[edit] Ver 2
- Covered in the above and implement in our Jan 2012 release
